


All Your Sauna Questions Answered

The Ultimate Guide to Sauna
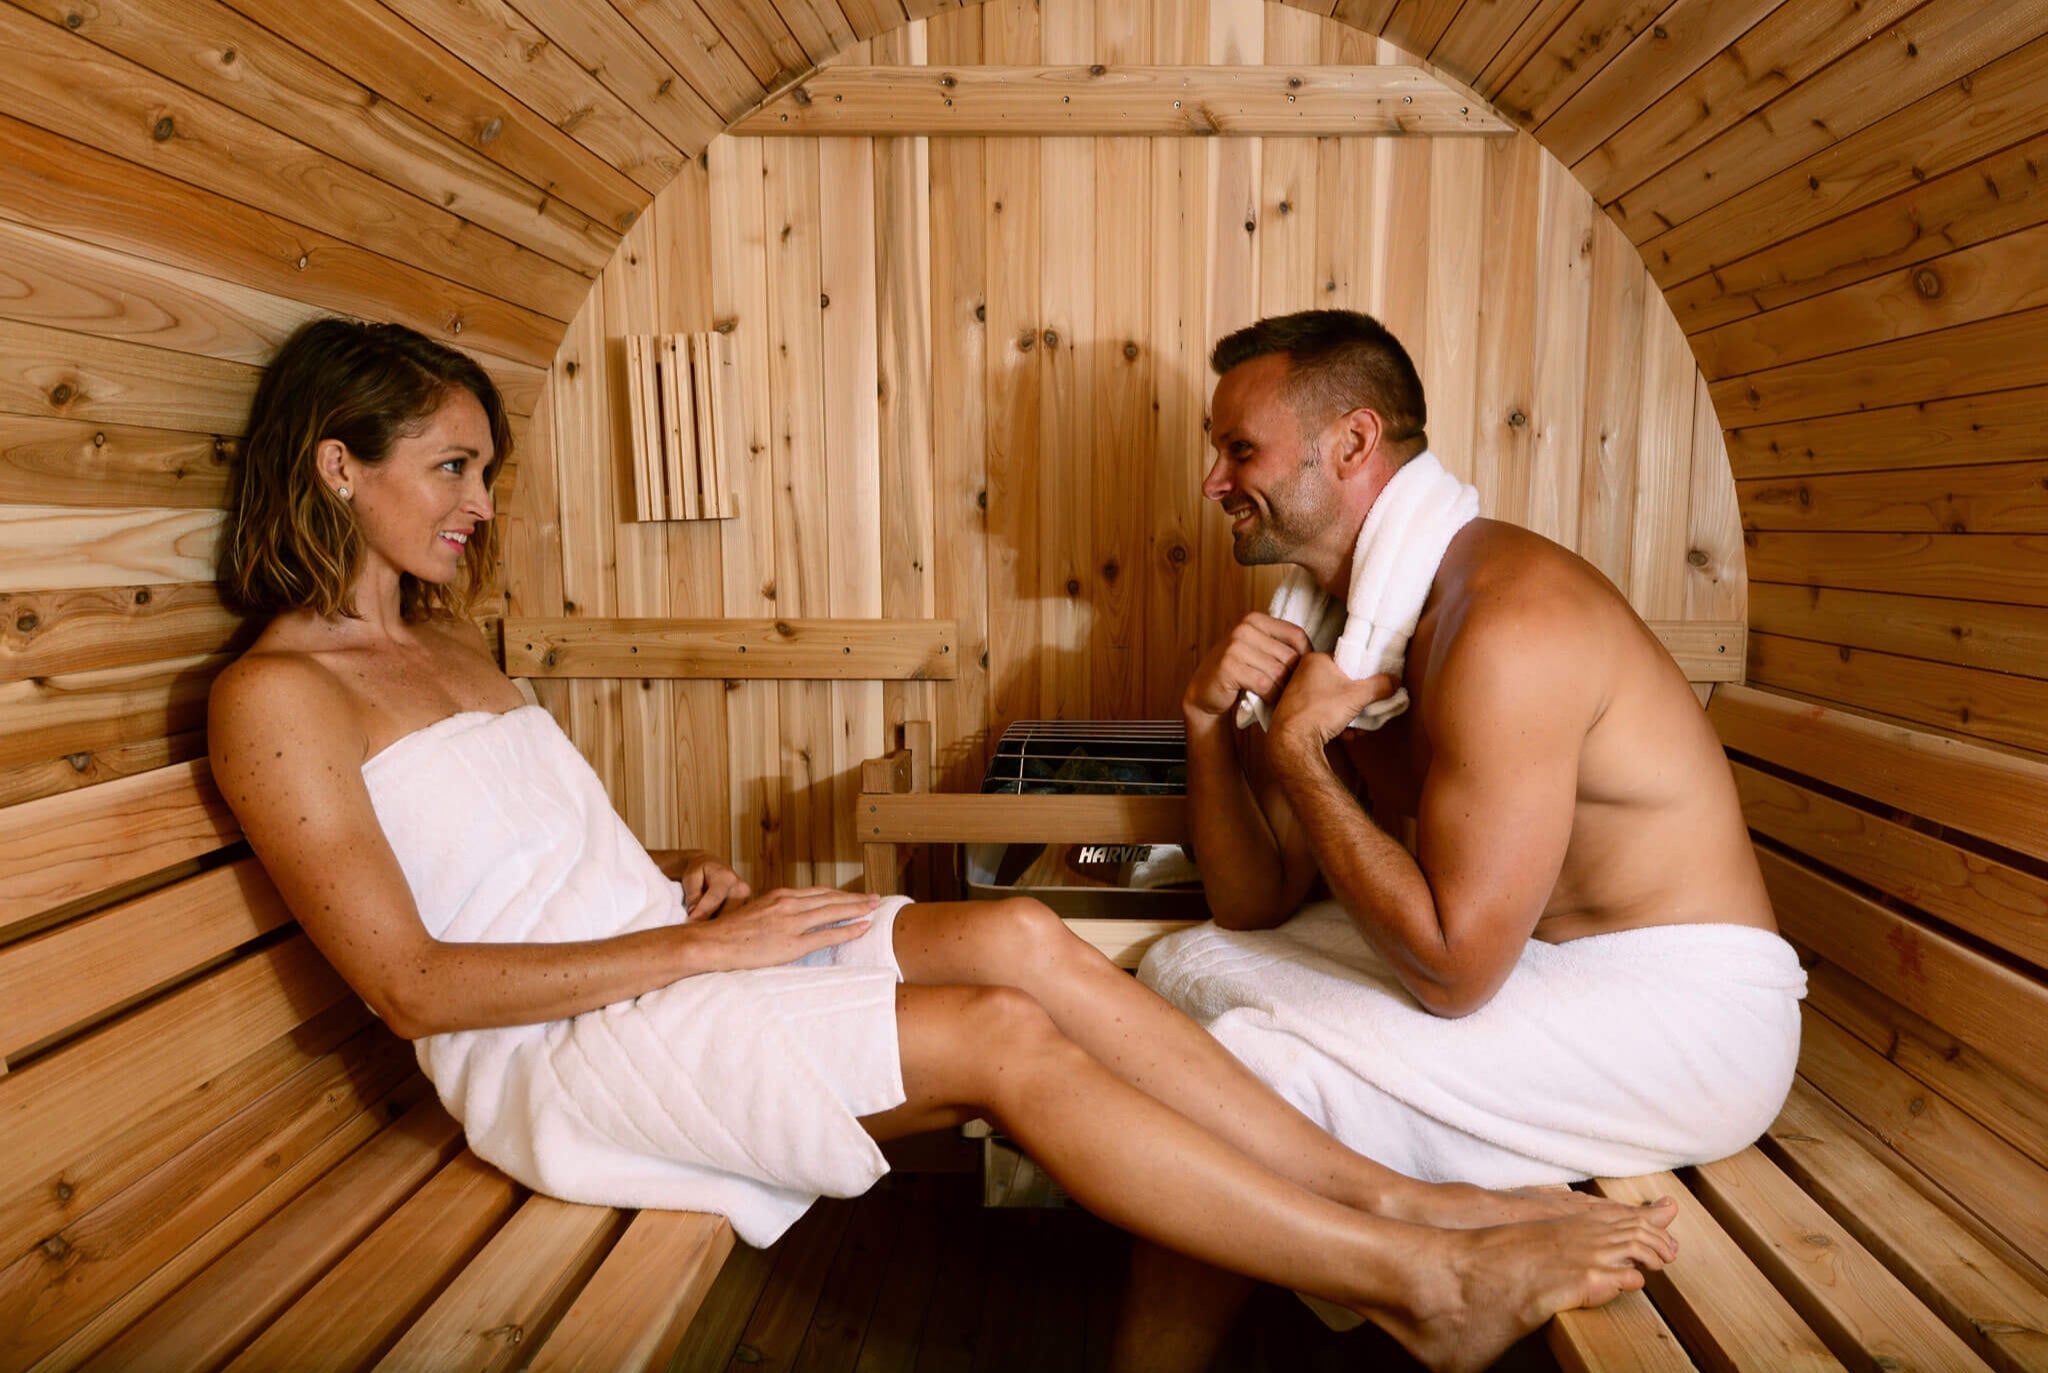
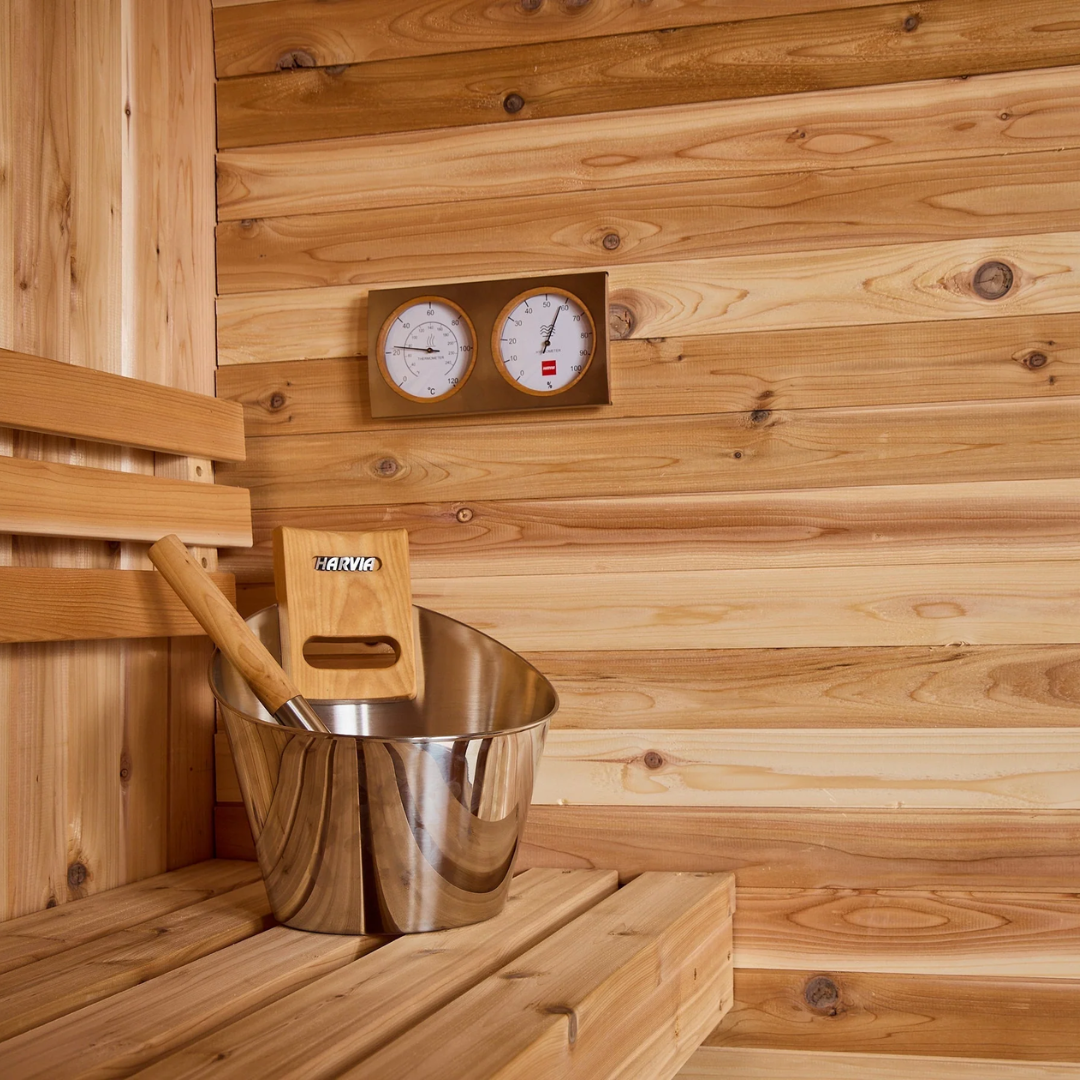
A sauna is more than just a heated room—it’s an ancient tradition deeply rooted in relaxation, wellness, and social connection. According to the International Sauna Association, a sauna is a wooden room heated to 175-194F with low humidity briefly increased by steam from water poured over hot stones. But sauna is more than just a definition—it’s a holistic experience that nurtures the body, mind, and spirit. Sauna provides scientifically proven health benefits, promotes well-being, and offers a natural escape from the stress of daily life. Whether enjoyed alone for reflection or shared with others in a peaceful setting, sauna is a timeless practice that everyone should have access to, no matter where they are. Types of Saunas: Find Your Perfect Fit Saunas come in various styles, each offering unique benefits. Understanding these differences can help you choose the best sauna for your lifestyle. 1. Traditional Saunas Heated by an electric or wood-burning stove loaded with stones. The famous Finnish löyly (steam) is created by splashing water on the hot stones. Benefits: Improves blood circulation Detoxifies the body through sweating Relieves muscle and joint pain Customizable experiences—from intense heat to a gentle, relaxing soak 2. Infrared Saunas Uses infrared panels to heat the body directly rather than warming the air. Operates at lower temperatures while still inducing deep sweating. Benefits: Faster recovery from sore muscles and joint pain Enhances cardiovascular health Lower temperatures make it ideal for those sensitive to high heat Heats up in 20-30 minutes, making it easy to use anytime 3. Hybrid Saunas A combination of traditional sauna heat and infrared technology. Offers the full benefits of both types, providing deeper muscle relaxation and detoxification. Benefits: Intense sweating and detox like a traditional sauna Infrared heat penetrates muscles deeply for better recovery 4. Steam Saunas/Shower Uses boiling water to create steam, maintaining high humidity with lower temperatures. Benefits: Ideal for muscle relaxation and skin hydration Provides a gentle heat for a soothing experience Helps with respiratory health and congestion relief The Benefits of Sauna: Why You Should Make It a Habit Short-Term Benefits Reduces stress by releasing endorphins, the body’s “feel-good” hormones. Improves sleep by regulating hormone activity and promoting deep rest. Relieves muscle and joint pain by increasing circulation and reducing soreness. Enhances skin health through deep sweating that removes toxins and impurities. Long-Term Health Benefits Heart Health: Regular sauna use improves cardiovascular function. Using a sauna 2-3 times a week reduces the risk of heart disease by over 20%, while 4-7 times a week lowers it by 50%. Better Circulation: Sauna improves blood vessel flexibility, reducing blood pressure and improving oxygen flow. Stronger Immunity: The heat stress triggers a boost in immune function, helping the body fight off illness. Cognitive Protection: Regular sauna use reduces the risk of dementia by 66% and Alzheimer’s by 65%. Sauna Use Reduces the Risk of: Heart-related deaths by 50% Dementia by 66% Alzheimer’s disease by 65% High blood pressure by 47% Pulmonary diseases by 41% Stroke by 62% Citation: https://www.mayoclinicproceedings.org/article/s0025-6196(18)30275-1/fulltext How to Sauna: A Step-by-Step Guide 1. Shower First: Always rinse off before entering to keep the sauna clean. 2. Relax & Adjust: Sit or lie down in a comfortable position. 3. Use Löyly (Steam): If using a traditional sauna, throw water on the stones to create steam, but be mindful of others. 4. Stay Hydrated: Drink water before, during, and after your sauna session. 5. Listen to Your Body: Stay in the sauna for 10-20 minutes or as long as feels good. 6. Cool Down: Step outside, take a cold shower, or enjoy fresh air. 7. Repeat If Desired: You can enjoy 2-4 rounds or just one—whatever works for you. 8. End with a Final Shower: Refresh before finishing your session. 9. Relax Afterward: Embrace the post-sauna calm and rehydrate. Choosing the Right Sauna for You 1. Sauna Type Do you prefer intense heat and steam? Choose a Traditional Sauna Need gentle, deep-penetrating warmth? Go for Infrared Want the best of both worlds? Try a Hybrid Sauna Prefer high humidity? A Steam Sauna/Shower is ideal 2. Location Indoor Sauna → Convenient and accessible year-round. Outdoor Sauna → Connects you with nature and provides a spa-like escape. 3. Size & Seating Ensure the sauna has proper seating height and enough space for users. 4. Features & Accessories Enhance your sauna with lighting, audio options, and safety features. Take The Perfect Sauna Quiz Choosing the Right Sauna Heater Types of Sauna Heaters Wall-mounted heaters → Best for small saunas with limited space. Floor-mounted heaters → Ideal for larger saunas. Wood-burning heaters → Perfect for certain outdoor sauna models with larger spaces. Pillar heaters → Provide even heat and steam due to their large stone capacity. Combi heaters → Include a built-in steamer, allowing precise humidity control. Matching Your Heater to Your Experience Soft & Gentle Sauna: Choose a heater with a large stone mass for long-lasting warmth. Hot & Dry Sauna: Opt for a heater with fewer stones for quick, intense heat. Moist Sauna (180% Humidity): Use a Combi heater for a steam-like experience. Take The Perfect Heater Quiz Preparing Your Indoor or Outdoor Sauna Space Setting Up an Outdoor Sauna Installing an outdoor sauna is an excellent way to create a backyard wellness retreat. To ensure stability, longevity, and an optimal experience, follow these key preparation steps: 1. Choose a Location: Select a flat, level area with good drainage, easy access to power (if using an electric heater), and privacy for relaxation. 2. Prepare a Solid Base: A sturdy foundation is essential for sauna stability. Recommended options include: Concrete Pad: Provides maximum durability (ideal thickness: 3-4 inches). Gravel Base: Allows for natural drainage (use 4-6 inches of crushed stone). Wood Deck or Patio: Aesthetically pleasing but must support the sauna’s weight. Paving Stones: A cost-effective option that ensures even weight distribution. 3. Plan for Electrical Needs: If using an electric heater, hire a licensed electrician to ensure proper wiring and compliance with local codes. 4. Finalize the Installation Site: Before assembling your sauna: Remove debris and level the ground. Confirm accessibility to power sources. Ensure ventilation around the sauna for air circulation. 💡 Note: Outdoor saunas are delivered curbside in flat-pack boxes and require assembly—plan for at least two people to assist in setup. Guide to How To Prepare Your Outdoor Sauna Space Preparing an Indoor Sauna Space An indoor sauna is a fantastic addition to a home gym, bathroom, or wellness space. Proper preparation ensures a safe and efficient installation: 1. Select the Best Location: Choose a space with good ventilation, structural support, and easy access to a shower or bathroom for post-sauna rinsing. Common locations include basements, home gyms, and master bathrooms. 2. Prepare the Flooring: Use water-resistant surfaces like tile, concrete, or laminate. Avoid placing the sauna directly on hardwood or carpet, as heat and moisture can cause damage. 3. Plan for Electrical Installation: Ensure the sauna is close to an appropriate power source. Hire a licensed electrician to install wiring safely and to code. 4. Final Considerations: Ensure the sauna door is positioned for easy access. Plan seating arrangements for comfort and space efficiency. Install sauna-safe lighting to enhance the ambiance. 💡 Note: Indoor saunas are also delivered in flat-pack boxes/crates for assembly—ensure you have the necessary space and tools for installation. Guide to How To Prepare Your Indoor Sauna Space Sauna Maintenance: Keeping Your Sauna in Great Shape Clean Regularly: Sweep, vacuum, and wipe down benches with sauna cleaner. Prevent Moisture Buildup: Let the heater stay warm after use to dry out the sauna. Ensure Proper Ventilation: Regular checks keep air circulation optimal. Check Chimney (For Wood-Burning Saunas): Regular maintenance ensures safety. Inspect Heater Stones Annually: Rearrange and replace any broken stones for even heating. Guide to Sauna Maintenance Sauna is for Everyone At Almost Heaven by Harvia, we believe that sauna should be accessible to all, no matter where you live. Whether you're looking for a personal retreat, a family wellness space, or a spa-like escape, there’s a perfect sauna for you. Investing in a sauna isn’t just about heat—it’s about creating a lifestyle of wellness, relaxation, and longevity. So, find the right sauna, heater, and setup for you, and start experiencing the profound benefits of sauna bathing today.
Learn more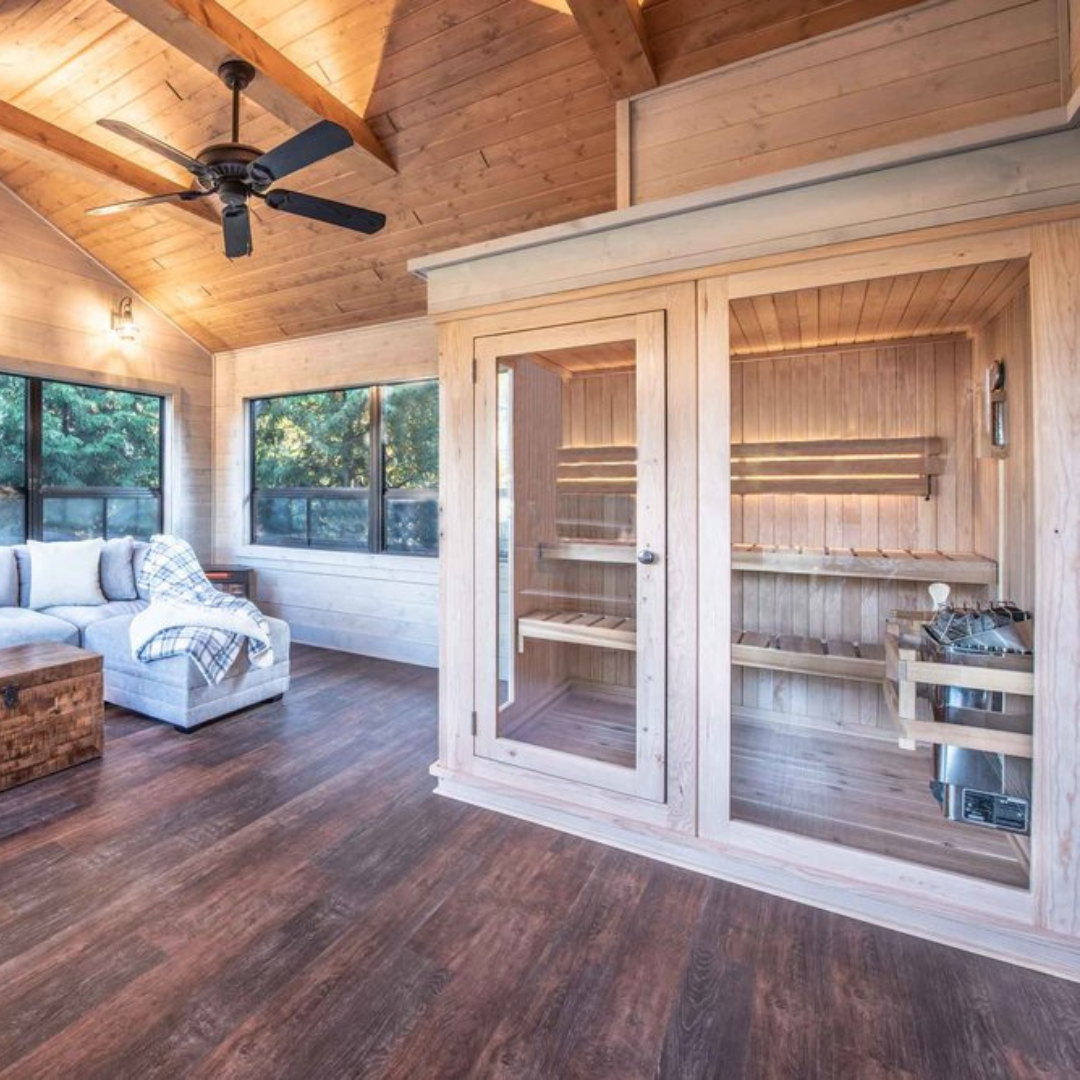
How To Prepare Your Indoor Sauna Space
Installing an indoor sauna is a fantastic way to create a personal wellness retreat inside your home. Whether integrating a freestanding sauna or building a custom sauna, proper preparation ensures optimal performance, safety, and longevity. Step 1: Choose the Right Location Before installing your sauna, consider the following factors to select the best location: ✔️ Accessibility: Pick a space that is easy to reach and provides privacy, ideally near a bathroom or shower for post-sauna rinsing. ✔️ Structural Integrity: Ensure the floor can support the sauna’s weight, especially in multi-story homes. ✔️ Ventilation: Good ventilation is essential to allow for fresh air intake and moisture removal. ✔️ Available Space: Determine the size of your sauna based on your needs and available room space. Common indoor sauna locations include: Home gyms Master bathrooms Basements Spas or wellness areas Thinking about placing an indoor sauna outdoors? Indoor saunas are not designed to withstand outdoor elements like rain or snow. If you’re considering an outdoor installation, keep in mind: Covering is required: A covered patio or pergola is ideal. Glass retains less heat: Indoor saunas have more glass than outdoor models, so in colder climates, upgrading to a more powerful heater is recommended. No enclosed floor: Indoor saunas do not come with flooring. If placing it on a slatted deck, install a sealed platform underneath to prevent drafts. Step 2: Frame Insulate the Space If you are building a custom indoor sauna, proper framing and insulation are key to heat retention and moisture control. ✔️ Frame the area: Use wood framing to create the sauna enclosure. ✔️ Insulate walls and ceiling: Use high-quality insulation like fiberglass or rock wool to maintain heat efficiency. ✔️ Install a vapor barrier: A foil-faced vapor barrier should be installed to prevent moisture from seeping into surrounding walls. Freestanding saunas do not require framing but should still be placed in a well-ventilated, dry area. Step 3: Electrical Considerations for Your Heater If you choose an electric sauna heater, proper installation is crucial for safety and compliance. ✔️ Power source: Ensure your chosen location has access to the appropriate electrical supply. ✔️ Consult an electrician: All electrical work must be performed by a licensed electrician who understands local codes and regulations. ✔️ Cost considerations: Electrical installation costs vary based on: Distance from your sauna to your electrical panel Local electrician rates Cost of wiring and material ✔️ Get multiple quotes: We recommend contacting 2-3 electricians for estimates before starting installation. Step 4: Prepare the Floor Your indoor sauna can be placed on almost any solid surface—including concrete, tile, and laminate. However, avoid placing it directly on carpet or hardwood flooring, as moisture and heat can cause damage. ✔️ Use a waterproof surface: Tile, concrete, or other water-resistant materials are best. ✔️ Ensure proper drainage: A slight floor slope can direct water toward a drain in areas with higher moisture. ✔️ Install a sealed platform if necessary: If placing the sauna on a slatted deck, build a sealed platform underneath to eliminate drafts. Step 5: Plan for Final Details Before installation, consider these final touches: ✔️ Door Size Placement: Ensure the sauna door is positioned for easy access. ✔️ Benches Seating: Plan your seating arrangement based on your comfort and available space. ✔️ Lighting: Use low-wattage, sauna-safe lighting to enhance the atmosphere. Step 6: Shipping Delivery Information All Almost Heaven Saunas ship within the continental U.S. via freight service. Here’s what to expect: ✔️ Delivery Timeline: Most saunas ship within 2-4 weeks, depending on the model and inventory availability. ✔️ Freight Delivery: The sauna will arrive in multiple flat-packaged boxes on a large truck. You will need to unload and move the boxes to your assembly location. ✔️ Curbside Drop-Off: The freight company will deliver the sauna to the curb or driveway, not inside the home or backyard. ✔️ Assembly Required: Most of our saunas are designed for DIY assembly with easy-to-follow instructions. We recommend having at least two people for installation. Need more details? Visit our full Shipping Info page. Preparing your space properly will ensure your indoor sauna lasts for years, providing a safe, comfortable environment for relaxation. Whether you’re placing your sauna in a home gym, bathroom, or basement, taking the right steps will maximize performance and durability. Need help choosing the perfect indoor sauna? Explore our collection of Almost Heaven Indoor Saunas today.
Learn more
How to Prepare Your Space for an Outdoor Sauna
Installing an outdoor sauna is an exciting way to enhance your backyard, providing a personal retreat for relaxation and wellness. Before setting up your Almost Heaven Sauna, it’s essential to properly prepare the base to ensure stability, longevity, and optimal performance. Step 1: Choose the Right Location Selecting the best location for your sauna is the first step. Keep these factors in mind: ✔️ Flat, Level Ground: A stable surface prevents shifting over time. ✔️ Good Drainage: Avoid areas prone to standing water. ✔️ Accessibility: Ensure easy access to a power source if using an electric heater. ✔️ Privacy & Views: Consider placement near landscaping or a scenic area for the best experience. Step 2: Select a Solid Base A stable foundation keeps your sauna secure and prolongs its life. Here are the most common base options: Concrete Pad (Recommended for Larger Saunas) Best for permanent installations Provides maximum stability Ideal thickness: 3-4 inches with proper leveling Gravel Base (Great for Drainage & Flexibility) Easy to install and allows natural water runoff Use crushed stone or gravel at least 4-6 inches deep Compact the gravel for a firm, level base Wood Deck or Patio (Ideal for Aesthetic Appeal) A great choice if you already have a deck or stone patio Ensure the structure is sturdy and supports the weight of the sauna Check for proper ventilation underneath to prevent moisture buildup Paving Stones or Patio Blocks (A Budget-Friendly Option) Use cement blocks or paving stones arranged in a level layout Helps distribute weight evenly Ensure the surface is compact and aligned Step 3: Electrical Considerations for Electric Heaters If you choose an electric sauna heater, proper wiring and installation are crucial for safety and compliance. ✔️ All electrical work must be performed by a qualified and licensed electrician with full knowledge of local codes and regulations. ✔️ Installation costs vary depending on factors such as: Distance from your sauna to your home’s electrical panel Local labor rates Cost of wiring and other materials ✔️ Get multiple quotes – We recommend reaching out to 2-3 licensed electricians for estimates before starting installation. Step 4: Prepare for Installation Once the base is set, make final preparations before sauna assembly: ✔️ Clear the area of debris, roots, or obstacles ✔️ Double-check leveling to prevent structural stress ✔️ Ensure accessibility to electricity if installing an electric heater ✔️ Allow for ventilation around the sauna for air circulation and longevity Step 5: Shipping & Delivery Information All Almost Heaven Saunas ship within the continental U.S. via freight service. Here’s what to expect: ✔️ Delivery Timeline: Most saunas ship within 2-4 weeks, depending on the model and inventory availability. ✔️ Freight Delivery: The sauna will arrive in multiple flat-packaged boxes on a large truck. You will need to unload and move the boxes to your assembly location. ✔️ Curbside Drop-Off: The freight company will deliver the sauna to the curb or driveway, not inside the home or backyard. ✔️ Assembly Required: Most of our saunas are designed for DIY assembly with easy-to-follow instructions. We recommend having at least two people for installation. Need more details? Visit our full Shipping Info page. A well-prepared base ensures your outdoor sauna lasts for years while providing a safe, comfortable space for relaxation. Whether you choose a gravel pad, concrete slab, or deck installation, a solid foundation will maximize your sauna’s stability and performance. Need help choosing the right outdoor sauna? Explore our selection of Almost Heaven Saunas and create your perfect wellness retreat today!
Learn more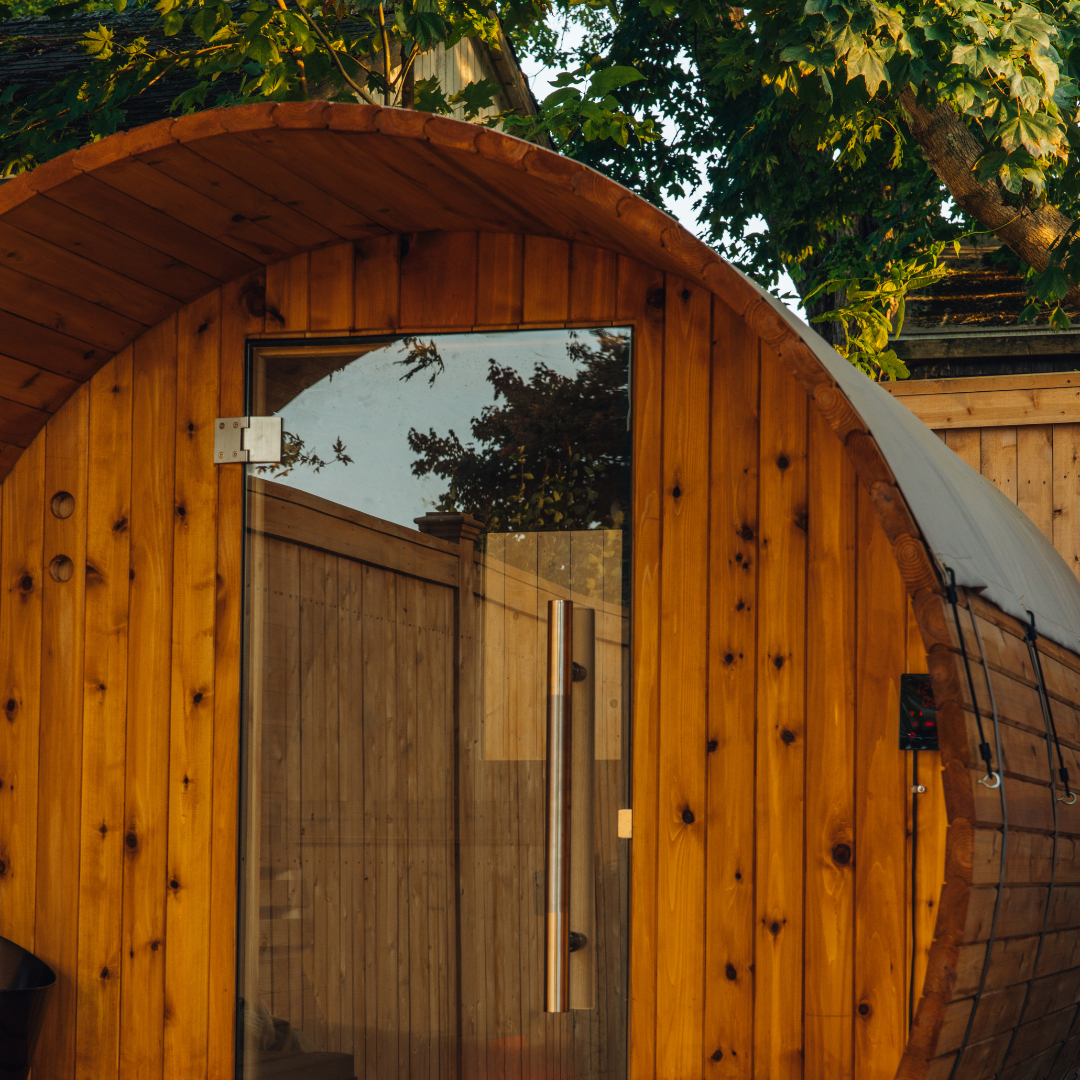
Why is My Barrel Door Not Closing? - How To
Barrel saunas are constructed from natural, untreated cedar, which expands and contracts with changing weather conditions. This movement is especially noticeable during the first year after assembly and can cause the sauna to settle unevenly. One common issue is the barrel leaning forward, which prevents the ends from staying perfectly upright in their original level position. This slight shift puts strain on the door frame, potentially causing the door to rub against the frame or not seal properly. How to Check If Your Barrel Needs Adjustment You can quickly test for an uneven barrel by: Placing a level vertically against the barrel ends. Checking if the bubble indicates that the barrel is leaning. If misalignment is detected, push the barrel back into position. Need a Visual Guide? Adjusting the barrel can sometimes be difficult to visualize, so we’ve created a helpful video to walk you through the process. Watch it here: Adjustment Video Additional Fix: Adjusting the Door Magnets If the barrel is level but the door is still not sealing properly, try: Loosening the door frame magnets slightly to improve the seal. If you need further assistance, feel free to reach out—we’re happy to help!
Learn more
How to Winterize Your Sauna
Tips on how to prepare your indoor and outdoor sauna for the winter months. Winter is right around the corner. For some of us, it’s already here! Whether you enjoy an outdoor barrel or cabin sauna, or stay inside with an indoor sauna, it’s important to maintain your sauna. With proper attention and a little bit of TLC, you can keep your sauna looking and working perfectly all year long. How to winterize your indoor sauna? The good news is that because indoor saunas don’t need protection from the elements, they won’t require much winter maintenance. The changing season is just a good reminder to do some basic TLC. Here are a few ways to keep your indoor sauna looking and feeling like new: Periodically sweep and vacuum any loose dirt or dust from the interior of your sauna Use a mild solution of baking soda and water to lightly scrub benches and other surfaces, then rinse. Adding a few drops of lemon essential oil can act as a natural disinfectant and add a pleasant aroma to the cleaning process. Tough stains on benches? Use a fine grit sandpaper to lightly sand down trouble spots Mop the floor or wipe with a damp cloth periodically Sauna heaters require little maintenance, but make sure to check your sauna stones for splitting and cracks every so often. How to winterize your outdoor sauna? At Almost Heaven Saunas, only the highest quality materials are used to make up our sauna kits. Barrel and cabin saunas are designed using Nordic Spruce, Red Cedar, or Hemlock Fir. These durable lumbers are naturally insulating and can withstand a variety of elements: sun exposure, wind, rain, snow, and anything else winter might throw at them. However, there are still a few ways you can help to expand the life of your sauna. Here’s how: Periodically sweep and vacuum any loose dirt, dust, tracked-in leaves from the interior of your sauna Use a mild solution of baking soda and water to lightly scrub benches and other surfaces, then rinse. Adding a few drops of lemon essential oil can act as a natural disinfectant and add a pleasant aroma to the cleaning process. Tough stains on benches? Use a fine grit sandpaper to lightly sand down trouble spots Mop the floor or wipe with a damp cloth periodically Sauna heaters require little maintenance, but make sure to check your sauna stones for splitting and cracks every so often. Check sauna staves. Make sure the exterior of your barrel is tightly sealed and staves are snug. Tighten any loose fitting staves, or add an extra stave if needed. Add an attractive UV- resistant rain jacket to help repel water and snow from the top of the sauna. https://almostheaven.com/collections/sauna-accessories/products/barrel-sauna-rain-jacket Note: Sauna rain jackets do not pair with wood-burning saunas with chimneys. The best way to maintain your sauna is by using it on a regular basis. Relax, enjoy, and don’t hesitate to call or email us with any questions you might have about winterizing your sauna!
Learn more
Heater Troubles? Here's What To Do
We are here to help! To start troubleshooting, we will first request a few photos of the heater. Please send one email with the photos attached, order number, and full name. Email: sales@almostheaven.com Phone: 888.355.3050 Photos needed to diagnose: 1. The back wall of your sauna including the heater to determine the height of the heater itself and the temperature sensor placement. 2. After removing the top cover of the sauna heater and the top layer of stones, take a photo of the exposed heating elements. 3. After removing the bottom plate of your heater, we will need to see the wiring. Please show all cables visible below your heater. 4. A photo of your sauna breaker to ensure a GFCI breaker is not in use. In addition to the photo of the labeled breaker, please confirm the wire size used by your licensed electrician along with the run or distance your sauna is from the breaker box. 5. Also, please type out and include the Heater Serial number. It is placed on the bottom of the heater After these photos are received, we can move on to further troubleshooting.
Learn more
Moving Your Sauna
Where you go, your sauna follows: a guide to moving your home sauna. Whether you are moving to a new house or rearranging your current setup, the logistics behind shifting an 800-pound sauna from one place to another is intimidating. You may be tempted to list the sauna with the house and buy another unit or redecorate the sauna space to satisfy your need for change. Before you commit, we are here to tell you that you can move your sauna. Here’s how! Step 1) Locate your new sauna spot Perhaps when you originally built your barrel sauna, your neighbor Steve had big hedges separating your lawns, but recently he decided to make a change and took them all down. Suddenly, the vista rear window you chose to add some natural light is now a portrait right into your relaxing sauna session. It’s time to move! Think about what you want in a new spot (Privacy? Open space? Proximity to the shower?) and determine if it is right for you. Step 2) Follow our sauna site preparation guides for indoor and barrel saunas You may get a sense of déjà vu during this step, but it’s important to make sure your sauna’s new home is just as good as the old one, if not better! Whether you are moving the sauna to your bathroom renovation or your garage, make sure this new spot is up to par. Pro tip: If your indoor sauna is on hard ground and you just want to move it across the room, use some furniture sliders. Simply place them under the corners and wrangle a friend to help you push it to the new location. Voilà! Don’t forget to follow the electrical instructions in steps 3 and 7. Step 3) Disconnect the sauna from power Do not move your sauna until the heater is disconnected from power. You’ll need to call on your electrician twice for this whole moving process to go smoothly, so make sure you have them on speed dial. Your new bestie, the electrician, will disconnect the heater so that you can easily move all your pieces from one place to the other. We cannot stress this enough—make sure a licensed electrician does this step! Pro tip: If you are moving a barrel sauna a short distance, skip steps 4-6 by using a forklift to easily move the sauna without having to disassemble! Step 4) Get to work with disassembly Dust off (or download) your sauna manual, flip to the end and work your way backward. Good news! You don’t have to work all the way to step one. If you have an indoor sauna, you can leave certain pieces intact (such as frames and roofing panels). For barrel saunas, stop your disassembly when you get to the base of the sauna. You can easily move the base on its own. Pro tip: Start with the interior pieces for an easier process. This will leave you with the sauna shell. Find a good sorting system—piles, labels, whatever works so that you can keep your parts straight. Step 5) Make the move If you are moving the sauna to a more secluded part of your lawn (bye, Steve!), you (and some friends) can move the pieces to your new location. If you are moving homes, make sure the pieces are secured in the back of a moving vehicle. You don’t need to have saved the packaging from the sauna to do this—just make several trips if you can’t fit everything in at once. Pro tip: Take some time to do a little cleaning! The last time your sauna was this exposed, it was in a box and ready for you to build. Take advantage of the disassembled state—clean wall pieces, stain the staves, and do a general check up of your sauna. Who knows the next time you will be able to clean this thoroughly? Indoor sauna pieces in the back of a truck. Sauna staves, ready to be cleaned. Barrel sauna pieces in the back of a trailer. Step 6) Build again Don’t throw away that manual just yet! Take a stretch break, hydrate, and double down. It’s time to build the sauna again (if you want to reacquaint yourself with the process, our assembly videos can be found here!). At this point, you are likely closing in on “expert sauna-builder” status. However, if you get lost in the process, give us a call (888.355.3050). Our team is happy to walk you through or shed some light on what comes next. Step 7) Reinstate electrical Pull out your phone and give your electrician a call—it’s time for part two. Now that the sauna is built, in all it’s new-home glory, it’s time to get power back to that baby! Pro tip: Before you hang the heater again, take some time to remove the sauna stones from the heater cavity and give them a wash. Step 8) Enjoy a well-deserved sauna from your new location Turn that sauna on, kick back, and relax. You deserve it! After all, you just moved an entire 800+ pound sauna, and whether it was 5 feet or miles away, we applaud your accomplishment. Investing in your health is a life-long process, and making sure your sauna moves with you is important! Don’t let the dream of a new house (or a new sauna location) hold you back from enjoying your sauna. If you have moved your sauna, reach out and tell your story—we can’t wait to hear about the process!
Learn more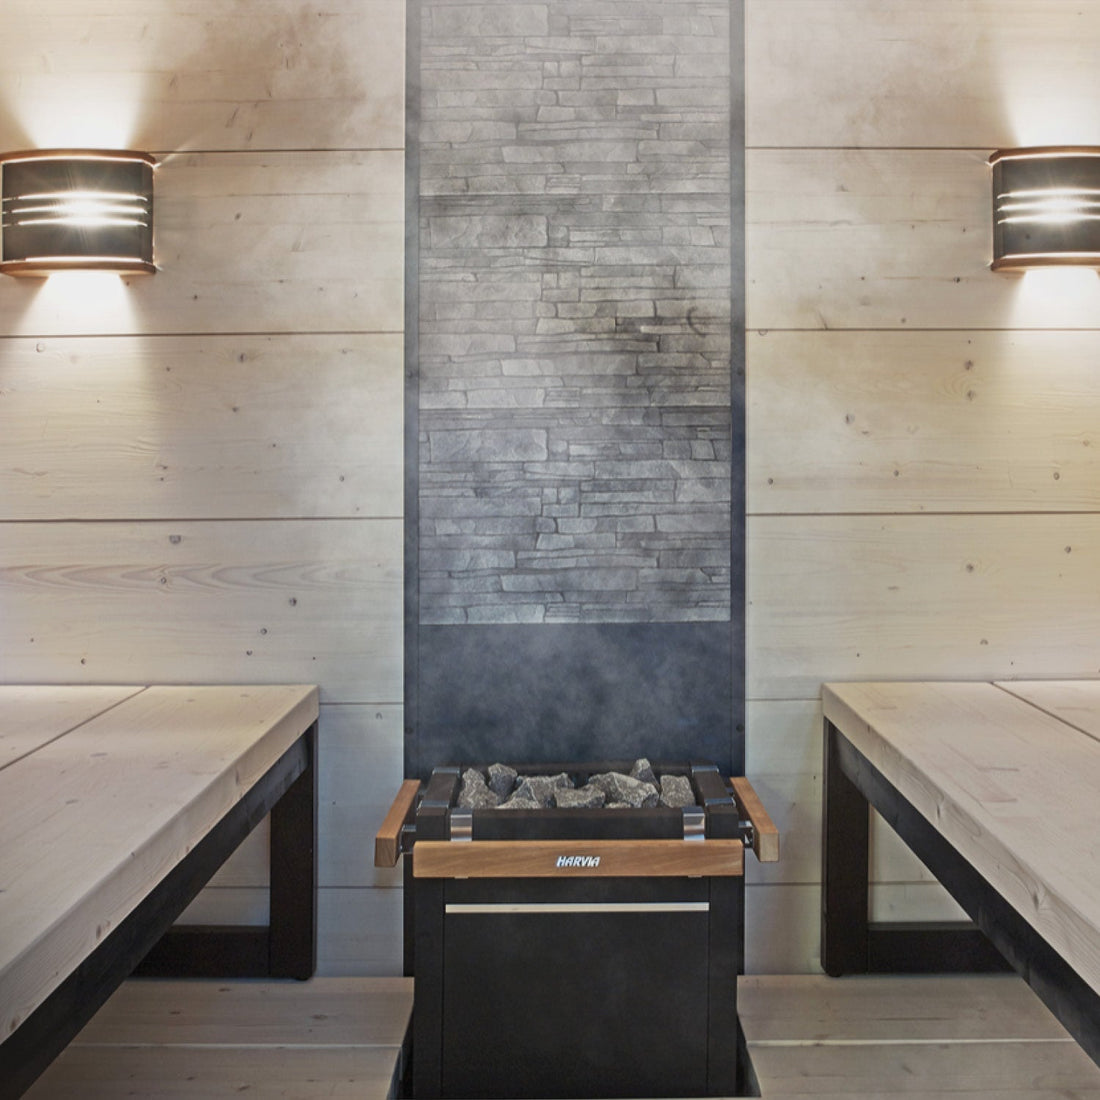
How to Increase Your Sauna Temperature
Hot tips to take your sauna heater to the next level. Some like it hot, but others like it HOT. Sure, your sauna will have you sweating even on the lower end of the temperature range, but if you want to take it up a notch and get every possible degree of heat out of your sauna, we have some tips for you! All of these points are applicable to increase the temperature of traditional electric sauna heaters, though some can be applied to wood-burning heaters or infrared units.As a point of reference, regulations in the United States enable electric saunas to heat up to about 185°F. If your heater isn’t getting there on its own, these suggestions should do the trick. Now, onto those hot tips we promised that will help to add a few extra degrees to your sauna experience: Right to the source: Your heater Ensure your heater (if you have the KIP), is mounted so the bottom of the heater is about 5-7” from the ground. If it is any higher, the hot air will be less likely to heat the lower part of your sauna. Move the temperature sensor lower. The purpose of the high-limit sensor is to shut off your heater if the room gets too hot. Since heat rises, if your sensor is too high, it could trigger the heater shut-off prematurely. We recommend placing the sensor 14"-18" down from the ceiling and 14"-18" away from the heater. Do not overpack the heater with sauna stones. Each KIP heater comes with a box of sauna stones –– you should have 5-10 stones left over. Fill the heater by starting with the smallest rocks and add stones until the elements are just covered. See More Heater Tips on YouTube Inside the sauna Close the vents. Most Almost Heaven saunas come with a set of vents: one under the heater to pull in fresh air, and a second near the ceiling on the wall opposite the heater to exhaust. We recommend leaving these vents open as the heater is warming up to avoid triggering the high-limit sensor. There is no harm in closing them as you begin your session and opening them again if it gets stuffy. Fan the hot air. Setting up a small fan or waving a towel will help spread out some of the hot air that tends to congregate near the top of the sauna. Add some humidity to your dry sauna! The beauty of a traditional heater is that you can sprinkle water over the stones, creating a burst of steam that dissipates throughout the sauna room. Though dry heat and wet heat are technically the same temperature, the wet heat feels a lot hotter than just dry alone. Outside the sauna Cover the sauna for extra insulation. This is particularly effective on barrel saunas located outdoors in colder climates. Adding an extra layer to the top of your sauna will help to trap that hot air in tightly. Our recommendations are poly insulation layered on top of an indoor sauna, or a rain jacket on a barrel sauna, as both of these options are able to stay intact while the sauna is in use. Poly insulation layered on top of an indoor sauna. Rain jacket on a barrel sauna. Tightly seal the sauna. Any gaps between barrel sauna staves or around the door can be releasing valuable hot air. Make sure the hinges on your door are tight to keep the door from slipping. If there are additional spaces around the door, adding a piece of weather stripping will help to increase the temperature in your sauna. As for barrel saunas, ensuring you’ve added as many staves as possible and fully tightened the bands is essential to sealing the sauna well. Remember, as you keep those temperatures rising, be sure to take it slow and stay hydrated. Your body will need time to acclimate to higher temperatures. But now that you have the inside scoop, go enjoy yourself an extra-sweaty sauna! If you have any questions on how to increase the temperature on your specific sauna heater, give Almost Heaven Saunas a call at 888.355.3050.
Learn more
When Should I Cover My Sauna?
When it rains, it pours. But how do you know when it’s time to give your barrel sauna some extra cover? Before we jump into the best cover for your sauna, first things first — let’s talk about the lumber. Your barrel sauna will likely have some water seepage. This is a natural byproduct of the soft lumbers that we use to build the saunas. After a rainfall, if you see some wet spots in your sauna – don’t panic! It will dry with time, but feel free to speed up the process by turning the heater on. Regular sauna use ensures that the interior room is kept dry. However, if you want to prevent seepage, we have some options. Now, what are some reasons you may need to cover your sauna? -The sauna is located under trees and is susceptible to bird and tree debris -Your area experiences a lot of precipitation -Your climate bounces between extreme weather conditions -You like the look of a sauna cover If you strongly relate to one of the above statements, then congratulations! You should think about getting a sauna cover. You are probably wondering what your options are. Take a look at the list below and see which cover works best for your sauna. 1. Almost Heaven Rain Jacket We have removable rain jackets for the spring or winter seasons when you might experience a lot of precipitation! The rain jacket comes in three colors (tan, charcoal gray, or navy) and attaches to the sauna with discrete bungees that connect to small eyelet screws. This makes installation and removal seamless! Bonus: you can leave this cover on top while the sauna is on. Check them out here! 2. Corrugated Metal Roof This is a more permanent solution for covering your sauna and can come in any color you want! Just check out your local hardware store for their options. Use .75” sheet metal screws to secure the roof onto your barrel sauna and voila, you should cut down on any pesky precipitation! 3. Roofing Shingles The great thing about using roofing shingles to cover your sauna is that you have a lot of options in both style and color! Installation may take more time since you are working with individual shingles. However, this means you can cover as much or as little of the top of the sauna as you want! 4. Physical Cover Think: awning, covered, porch, or free-standing structure. Use your carpentry skills or commission a friend to build your barrel sauna a beautiful centerpiece to cover it from precipitation. This option will take a lot of resources, but if you are already showcasing your barrel sauna in your backyard, why not go all out? 5. Tarp Perhaps the easiest option on this list, simply purchase a tarp to cover the sauna when it is not in use. You can strap them down however you wish and just remove before you start your sauna session! We hope this list has been useful as your sauna becomes acclimated to its environment. If you are pondering a barrel sauna purchase, we invite you to browse our sauna sale page and see if there is a right fit for you! Check out our social media pages (Facebook, Twitter, Instagram) to see more customer sauna photos and stay up-to-date on the latest Almost Heaven news. If you want help deciding which sauna cover is best for you, call us at 888-355-3050 or drop us a message. We are always here to help and want you to have the best possible experience with your barrel sauna!
Learn more
Discover Sauna Health Benefits
Learn about the remarkable physical and psychological benefits that come from a regular sauna routine.
The Ultimate Guide to Sauna
A sauna is more than just a heated room—it’s an ancient tradition deeply rooted in relaxation, wellness, and social connection. According to the International Sauna Association, a sauna is a wooden room heated to 175-194F with low humidity briefly increased by steam from water poured over hot stones. But sauna is more than just a definition—it’s a holistic experience that nurtures the body, mind, and spirit. Sauna provides scientifically proven health benefits, promotes well-being, and offers a natural escape from the stress of daily life. Whether enjoyed alone for reflection or shared with others in a peaceful setting, sauna is a timeless practice that everyone should have access to, no matter where they are. Types of Saunas: Find Your Perfect Fit Saunas come in various styles, each offering unique benefits. Understanding these differences can help you choose the best sauna for your lifestyle. 1. Traditional Saunas Heated by an electric or wood-burning stove loaded with stones. The famous Finnish löyly (steam) is created by splashing water on the hot stones. Benefits: Improves blood circulation Detoxifies the body through sweating Relieves muscle and joint pain Customizable experiences—from intense heat to a gentle, relaxing soak 2. Infrared Saunas Uses infrared panels to heat the body directly rather than warming the air. Operates at lower temperatures while still inducing deep sweating. Benefits: Faster recovery from sore muscles and joint pain Enhances cardiovascular health Lower temperatures make it ideal for those sensitive to high heat Heats up in 20-30 minutes, making it easy to use anytime 3. Hybrid Saunas A combination of traditional sauna heat and infrared technology. Offers the full benefits of both types, providing deeper muscle relaxation and detoxification. Benefits: Intense sweating and detox like a traditional sauna Infrared heat penetrates muscles deeply for better recovery 4. Steam Saunas/Shower Uses boiling water to create steam, maintaining high humidity with lower temperatures. Benefits: Ideal for muscle relaxation and skin hydration Provides a gentle heat for a soothing experience Helps with respiratory health and congestion relief The Benefits of Sauna: Why You Should Make It a Habit Short-Term Benefits Reduces stress by releasing endorphins, the body’s “feel-good” hormones. Improves sleep by regulating hormone activity and promoting deep rest. Relieves muscle and joint pain by increasing circulation and reducing soreness. Enhances skin health through deep sweating that removes toxins and impurities. Long-Term Health Benefits Heart Health: Regular sauna use improves cardiovascular function. Using a sauna 2-3 times a week reduces the risk of heart disease by over 20%, while 4-7 times a week lowers it by 50%. Better Circulation: Sauna improves blood vessel flexibility, reducing blood pressure and improving oxygen flow. Stronger Immunity: The heat stress triggers a boost in immune function, helping the body fight off illness. Cognitive Protection: Regular sauna use reduces the risk of dementia by 66% and Alzheimer’s by 65%. Sauna Use Reduces the Risk of: Heart-related deaths by 50% Dementia by 66% Alzheimer’s disease by 65% High blood pressure by 47% Pulmonary diseases by 41% Stroke by 62% Citation: https://www.mayoclinicproceedings.org/article/s0025-6196(18)30275-1/fulltext How to Sauna: A Step-by-Step Guide 1. Shower First: Always rinse off before entering to keep the sauna clean. 2. Relax & Adjust: Sit or lie down in a comfortable position. 3. Use Löyly (Steam): If using a traditional sauna, throw water on the stones to create steam, but be mindful of others. 4. Stay Hydrated: Drink water before, during, and after your sauna session. 5. Listen to Your Body: Stay in the sauna for 10-20 minutes or as long as feels good. 6. Cool Down: Step outside, take a cold shower, or enjoy fresh air. 7. Repeat If Desired: You can enjoy 2-4 rounds or just one—whatever works for you. 8. End with a Final Shower: Refresh before finishing your session. 9. Relax Afterward: Embrace the post-sauna calm and rehydrate. Choosing the Right Sauna for You 1. Sauna Type Do you prefer intense heat and steam? Choose a Traditional Sauna Need gentle, deep-penetrating warmth? Go for Infrared Want the best of both worlds? Try a Hybrid Sauna Prefer high humidity? A Steam Sauna/Shower is ideal 2. Location Indoor Sauna → Convenient and accessible year-round. Outdoor Sauna → Connects you with nature and provides a spa-like escape. 3. Size & Seating Ensure the sauna has proper seating height and enough space for users. 4. Features & Accessories Enhance your sauna with lighting, audio options, and safety features. Take The Perfect Sauna Quiz Choosing the Right Sauna Heater Types of Sauna Heaters Wall-mounted heaters → Best for small saunas with limited space. Floor-mounted heaters → Ideal for larger saunas. Wood-burning heaters → Perfect for certain outdoor sauna models with larger spaces. Pillar heaters → Provide even heat and steam due to their large stone capacity. Combi heaters → Include a built-in steamer, allowing precise humidity control. Matching Your Heater to Your Experience Soft & Gentle Sauna: Choose a heater with a large stone mass for long-lasting warmth. Hot & Dry Sauna: Opt for a heater with fewer stones for quick, intense heat. Moist Sauna (180% Humidity): Use a Combi heater for a steam-like experience. Take The Perfect Heater Quiz Preparing Your Indoor or Outdoor Sauna Space Setting Up an Outdoor Sauna Installing an outdoor sauna is an excellent way to create a backyard wellness retreat. To ensure stability, longevity, and an optimal experience, follow these key preparation steps: 1. Choose a Location: Select a flat, level area with good drainage, easy access to power (if using an electric heater), and privacy for relaxation. 2. Prepare a Solid Base: A sturdy foundation is essential for sauna stability. Recommended options include: Concrete Pad: Provides maximum durability (ideal thickness: 3-4 inches). Gravel Base: Allows for natural drainage (use 4-6 inches of crushed stone). Wood Deck or Patio: Aesthetically pleasing but must support the sauna’s weight. Paving Stones: A cost-effective option that ensures even weight distribution. 3. Plan for Electrical Needs: If using an electric heater, hire a licensed electrician to ensure proper wiring and compliance with local codes. 4. Finalize the Installation Site: Before assembling your sauna: Remove debris and level the ground. Confirm accessibility to power sources. Ensure ventilation around the sauna for air circulation. 💡 Note: Outdoor saunas are delivered curbside in flat-pack boxes and require assembly—plan for at least two people to assist in setup. Guide to How To Prepare Your Outdoor Sauna Space Preparing an Indoor Sauna Space An indoor sauna is a fantastic addition to a home gym, bathroom, or wellness space. Proper preparation ensures a safe and efficient installation: 1. Select the Best Location: Choose a space with good ventilation, structural support, and easy access to a shower or bathroom for post-sauna rinsing. Common locations include basements, home gyms, and master bathrooms. 2. Prepare the Flooring: Use water-resistant surfaces like tile, concrete, or laminate. Avoid placing the sauna directly on hardwood or carpet, as heat and moisture can cause damage. 3. Plan for Electrical Installation: Ensure the sauna is close to an appropriate power source. Hire a licensed electrician to install wiring safely and to code. 4. Final Considerations: Ensure the sauna door is positioned for easy access. Plan seating arrangements for comfort and space efficiency. Install sauna-safe lighting to enhance the ambiance. 💡 Note: Indoor saunas are also delivered in flat-pack boxes/crates for assembly—ensure you have the necessary space and tools for installation. Guide to How To Prepare Your Indoor Sauna Space Sauna Maintenance: Keeping Your Sauna in Great Shape Clean Regularly: Sweep, vacuum, and wipe down benches with sauna cleaner. Prevent Moisture Buildup: Let the heater stay warm after use to dry out the sauna. Ensure Proper Ventilation: Regular checks keep air circulation optimal. Check Chimney (For Wood-Burning Saunas): Regular maintenance ensures safety. Inspect Heater Stones Annually: Rearrange and replace any broken stones for even heating. Guide to Sauna Maintenance Sauna is for Everyone At Almost Heaven by Harvia, we believe that sauna should be accessible to all, no matter where you live. Whether you're looking for a personal retreat, a family wellness space, or a spa-like escape, there’s a perfect sauna for you. Investing in a sauna isn’t just about heat—it’s about creating a lifestyle of wellness, relaxation, and longevity. So, find the right sauna, heater, and setup for you, and start experiencing the profound benefits of sauna bathing today.
Learn more
Become the Best Version of Yourself
Become the Best Version of Yourself Working toward personal goals—whether it’s improving health, making more time for loved ones, or prioritizing self-care—can be challenging. As life gets busy, routines shift, and motivation can fade. Almost Heaven Saunas is here to help you stay on track with five practical ways to enhance your sauna experience and support your journey toward a healthier, more balanced life. 1. Add Essential Oils Elevate your sauna experience with the power of essential oils. Almost Heaven Saunas offers eight natural essential oil scents, available in a box set or individually. Each oil carries unique benefits: Pine – Reduces inflammation, boosts immunity, relieves stress Ylang Ylang – Mood-lifting, antiseptic, deeply relaxing Lavender – Enhances sleep, reduces anxiety, eases pain Cedarwood – Anti-inflammatory, natural antiseptic, deodorizer Frankincense – Supports immunity, promotes skin health, aids digestion Eucalyptus – Invigorating, relaxing, clears the mind Peppermint – Energizing, cooling, and calming Lemon – Mood booster, immune support, natural antiseptic Mix and match to create the perfect sauna atmosphere—just add a few drops of oil to a bucket of water and enjoy the benefits of these mood-boosting, body-relaxing, and mind-clearing scents. 2. Turn up the heat- Sauna Workouts Maximize your sauna time by incorporating light movement. Try squats, push-ups, or gentle stretching—heat helps release lactic acid from muscles, easing tension and improving flexibility. Simply sitting in a sauna burns calories, but adding a little activity can enhance the benefits. Just remember to stay hydrated and listen to your body! 3. Family Sauna Night Prioritize meaningful connections by dedicating time to a sauna night with family or friends. No screens, no distractions—just genuine conversation and relaxation in the warmth of your sauna. 4. Get Better Sleep Saunas help melt away stress, allowing the body to unwind and the mind to relax. As a sauna session ends, endorphins are released, creating a deep sense of calm that promotes restful sleep. Struggling with insomnia? A few drops of lavender essential oil in the sauna can help prepare the body and mind for a night of deep, quality rest. 5. Be Consistent Sticking to healthy habits can be difficult, but consistency is key. The more regularly a sauna is used, the more noticeable the benefits become. Regular sauna sessions not only promote relaxation but also contribute to overall well-being, helping to maintain focus, energy, and motivation in all areas of life. No matter what the goal, taking time for a sauna session can help restore balance—physically, mentally, and spiritually—leaving you refreshed and ready to keep moving forward. Start today. Start with a sauna.
Learn more
Sweat Out Toxins: Sauna Detox Benefits
Discover the powerful benefits of sauna detox in eliminating plastic toxins from your body and promoting overall health.
Learn more
Essential Sauna Ownership Tips
Understand the critical elements of sauna care, proper use, and session techniques for lasting enjoyment of your personal sanctuary.

Almost Heaven Saunas Featured in Martha Stewart
We’re excited to share that Almost Heaven Saunas is featured in Martha Stewart's guide to building a home sauna—complete with tips from our own Kellen Mouw on planning a stress-free setup.Read it here: https://www.marthastewart.com/how-to-build-home-sauna-11794719 Why this matters As part of the Harvia family—the global leader in sauna—Almost Heaven builds USA-made saunas known for quality craftsmanship and timeless design. Our indoor and outdoor models bring daily wellness into your routine while elevating the look of any space. What the article covers Pick your vibe first. Indoors or outdoors? Traditional, infrared, or hybrid heat? Decide up front and everything else gets easier. Budget basics. Small 1–2 person saunas often land in the mid-$4Ks; larger family sizes typically run $6K–$10K. Heater costs vary by type, and electric units add a modest monthly operating cost with regular use. Design that feels good. Softwoods like cedar, multi-level benches, solid ventilation, and tempered-glass doors deliver comfort, durability, and safety. Setup tips. Many prefab kits are DIY-friendly with a helper in a few hours. Hire a licensed electrician for wiring, and use a level base outdoors. Seeing our team’s know-how featured by Martha Stewart Living reinforces what we aim for every day: attainable luxury—well-built, beautiful saunas that support real wellness at home. Thinking about your own sauna? Explore our indoor and outdoor collections, or reach out and we’ll help you choose the right size, heater, and installation path—no stress.
Learn more
The Ultimate Guide to Sauna
A sauna is more than just a heated room—it’s an ancient tradition deeply rooted in relaxation, wellness, and social connection. According to the International Sauna Association, a sauna is a wooden room heated to 175-194F with low humidity briefly increased by steam from water poured over hot stones. But sauna is more than just a definition—it’s a holistic experience that nurtures the body, mind, and spirit. Sauna provides scientifically proven health benefits, promotes well-being, and offers a natural escape from the stress of daily life. Whether enjoyed alone for reflection or shared with others in a peaceful setting, sauna is a timeless practice that everyone should have access to, no matter where they are. Types of Saunas: Find Your Perfect Fit Saunas come in various styles, each offering unique benefits. Understanding these differences can help you choose the best sauna for your lifestyle. 1. Traditional Saunas Heated by an electric or wood-burning stove loaded with stones. The famous Finnish löyly (steam) is created by splashing water on the hot stones. Benefits: Improves blood circulation Detoxifies the body through sweating Relieves muscle and joint pain Customizable experiences—from intense heat to a gentle, relaxing soak 2. Infrared Saunas Uses infrared panels to heat the body directly rather than warming the air. Operates at lower temperatures while still inducing deep sweating. Benefits: Faster recovery from sore muscles and joint pain Enhances cardiovascular health Lower temperatures make it ideal for those sensitive to high heat Heats up in 20-30 minutes, making it easy to use anytime 3. Hybrid Saunas A combination of traditional sauna heat and infrared technology. Offers the full benefits of both types, providing deeper muscle relaxation and detoxification. Benefits: Intense sweating and detox like a traditional sauna Infrared heat penetrates muscles deeply for better recovery 4. Steam Saunas/Shower Uses boiling water to create steam, maintaining high humidity with lower temperatures. Benefits: Ideal for muscle relaxation and skin hydration Provides a gentle heat for a soothing experience Helps with respiratory health and congestion relief The Benefits of Sauna: Why You Should Make It a Habit Short-Term Benefits Reduces stress by releasing endorphins, the body’s “feel-good” hormones. Improves sleep by regulating hormone activity and promoting deep rest. Relieves muscle and joint pain by increasing circulation and reducing soreness. Enhances skin health through deep sweating that removes toxins and impurities. Long-Term Health Benefits Heart Health: Regular sauna use improves cardiovascular function. Using a sauna 2-3 times a week reduces the risk of heart disease by over 20%, while 4-7 times a week lowers it by 50%. Better Circulation: Sauna improves blood vessel flexibility, reducing blood pressure and improving oxygen flow. Stronger Immunity: The heat stress triggers a boost in immune function, helping the body fight off illness. Cognitive Protection: Regular sauna use reduces the risk of dementia by 66% and Alzheimer’s by 65%. Sauna Use Reduces the Risk of: Heart-related deaths by 50% Dementia by 66% Alzheimer’s disease by 65% High blood pressure by 47% Pulmonary diseases by 41% Stroke by 62% Citation: https://www.mayoclinicproceedings.org/article/s0025-6196(18)30275-1/fulltext How to Sauna: A Step-by-Step Guide 1. Shower First: Always rinse off before entering to keep the sauna clean. 2. Relax & Adjust: Sit or lie down in a comfortable position. 3. Use Löyly (Steam): If using a traditional sauna, throw water on the stones to create steam, but be mindful of others. 4. Stay Hydrated: Drink water before, during, and after your sauna session. 5. Listen to Your Body: Stay in the sauna for 10-20 minutes or as long as feels good. 6. Cool Down: Step outside, take a cold shower, or enjoy fresh air. 7. Repeat If Desired: You can enjoy 2-4 rounds or just one—whatever works for you. 8. End with a Final Shower: Refresh before finishing your session. 9. Relax Afterward: Embrace the post-sauna calm and rehydrate. Choosing the Right Sauna for You 1. Sauna Type Do you prefer intense heat and steam? Choose a Traditional Sauna Need gentle, deep-penetrating warmth? Go for Infrared Want the best of both worlds? Try a Hybrid Sauna Prefer high humidity? A Steam Sauna/Shower is ideal 2. Location Indoor Sauna → Convenient and accessible year-round. Outdoor Sauna → Connects you with nature and provides a spa-like escape. 3. Size & Seating Ensure the sauna has proper seating height and enough space for users. 4. Features & Accessories Enhance your sauna with lighting, audio options, and safety features. Take The Perfect Sauna Quiz Choosing the Right Sauna Heater Types of Sauna Heaters Wall-mounted heaters → Best for small saunas with limited space. Floor-mounted heaters → Ideal for larger saunas. Wood-burning heaters → Perfect for certain outdoor sauna models with larger spaces. Pillar heaters → Provide even heat and steam due to their large stone capacity. Combi heaters → Include a built-in steamer, allowing precise humidity control. Matching Your Heater to Your Experience Soft & Gentle Sauna: Choose a heater with a large stone mass for long-lasting warmth. Hot & Dry Sauna: Opt for a heater with fewer stones for quick, intense heat. Moist Sauna (180% Humidity): Use a Combi heater for a steam-like experience. Take The Perfect Heater Quiz Preparing Your Indoor or Outdoor Sauna Space Setting Up an Outdoor Sauna Installing an outdoor sauna is an excellent way to create a backyard wellness retreat. To ensure stability, longevity, and an optimal experience, follow these key preparation steps: 1. Choose a Location: Select a flat, level area with good drainage, easy access to power (if using an electric heater), and privacy for relaxation. 2. Prepare a Solid Base: A sturdy foundation is essential for sauna stability. Recommended options include: Concrete Pad: Provides maximum durability (ideal thickness: 3-4 inches). Gravel Base: Allows for natural drainage (use 4-6 inches of crushed stone). Wood Deck or Patio: Aesthetically pleasing but must support the sauna’s weight. Paving Stones: A cost-effective option that ensures even weight distribution. 3. Plan for Electrical Needs: If using an electric heater, hire a licensed electrician to ensure proper wiring and compliance with local codes. 4. Finalize the Installation Site: Before assembling your sauna: Remove debris and level the ground. Confirm accessibility to power sources. Ensure ventilation around the sauna for air circulation. 💡 Note: Outdoor saunas are delivered curbside in flat-pack boxes and require assembly—plan for at least two people to assist in setup. Guide to How To Prepare Your Outdoor Sauna Space Preparing an Indoor Sauna Space An indoor sauna is a fantastic addition to a home gym, bathroom, or wellness space. Proper preparation ensures a safe and efficient installation: 1. Select the Best Location: Choose a space with good ventilation, structural support, and easy access to a shower or bathroom for post-sauna rinsing. Common locations include basements, home gyms, and master bathrooms. 2. Prepare the Flooring: Use water-resistant surfaces like tile, concrete, or laminate. Avoid placing the sauna directly on hardwood or carpet, as heat and moisture can cause damage. 3. Plan for Electrical Installation: Ensure the sauna is close to an appropriate power source. Hire a licensed electrician to install wiring safely and to code. 4. Final Considerations: Ensure the sauna door is positioned for easy access. Plan seating arrangements for comfort and space efficiency. Install sauna-safe lighting to enhance the ambiance. 💡 Note: Indoor saunas are also delivered in flat-pack boxes/crates for assembly—ensure you have the necessary space and tools for installation. Guide to How To Prepare Your Indoor Sauna Space Sauna Maintenance: Keeping Your Sauna in Great Shape Clean Regularly: Sweep, vacuum, and wipe down benches with sauna cleaner. Prevent Moisture Buildup: Let the heater stay warm after use to dry out the sauna. Ensure Proper Ventilation: Regular checks keep air circulation optimal. Check Chimney (For Wood-Burning Saunas): Regular maintenance ensures safety. Inspect Heater Stones Annually: Rearrange and replace any broken stones for even heating. Guide to Sauna Maintenance Sauna is for Everyone At Almost Heaven by Harvia, we believe that sauna should be accessible to all, no matter where you live. Whether you're looking for a personal retreat, a family wellness space, or a spa-like escape, there’s a perfect sauna for you. Investing in a sauna isn’t just about heat—it’s about creating a lifestyle of wellness, relaxation, and longevity. So, find the right sauna, heater, and setup for you, and start experiencing the profound benefits of sauna bathing today.
Learn more
How To Prepare Your Indoor Sauna Space
Installing an indoor sauna is a fantastic way to create a personal wellness retreat inside your home. Whether integrating a freestanding sauna or building a custom sauna, proper preparation ensures optimal performance, safety, and longevity. Step 1: Choose the Right Location Before installing your sauna, consider the following factors to select the best location: ✔️ Accessibility: Pick a space that is easy to reach and provides privacy, ideally near a bathroom or shower for post-sauna rinsing. ✔️ Structural Integrity: Ensure the floor can support the sauna’s weight, especially in multi-story homes. ✔️ Ventilation: Good ventilation is essential to allow for fresh air intake and moisture removal. ✔️ Available Space: Determine the size of your sauna based on your needs and available room space. Common indoor sauna locations include: Home gyms Master bathrooms Basements Spas or wellness areas Thinking about placing an indoor sauna outdoors? Indoor saunas are not designed to withstand outdoor elements like rain or snow. If you’re considering an outdoor installation, keep in mind: Covering is required: A covered patio or pergola is ideal. Glass retains less heat: Indoor saunas have more glass than outdoor models, so in colder climates, upgrading to a more powerful heater is recommended. No enclosed floor: Indoor saunas do not come with flooring. If placing it on a slatted deck, install a sealed platform underneath to prevent drafts. Step 2: Frame Insulate the Space If you are building a custom indoor sauna, proper framing and insulation are key to heat retention and moisture control. ✔️ Frame the area: Use wood framing to create the sauna enclosure. ✔️ Insulate walls and ceiling: Use high-quality insulation like fiberglass or rock wool to maintain heat efficiency. ✔️ Install a vapor barrier: A foil-faced vapor barrier should be installed to prevent moisture from seeping into surrounding walls. Freestanding saunas do not require framing but should still be placed in a well-ventilated, dry area. Step 3: Electrical Considerations for Your Heater If you choose an electric sauna heater, proper installation is crucial for safety and compliance. ✔️ Power source: Ensure your chosen location has access to the appropriate electrical supply. ✔️ Consult an electrician: All electrical work must be performed by a licensed electrician who understands local codes and regulations. ✔️ Cost considerations: Electrical installation costs vary based on: Distance from your sauna to your electrical panel Local electrician rates Cost of wiring and material ✔️ Get multiple quotes: We recommend contacting 2-3 electricians for estimates before starting installation. Step 4: Prepare the Floor Your indoor sauna can be placed on almost any solid surface—including concrete, tile, and laminate. However, avoid placing it directly on carpet or hardwood flooring, as moisture and heat can cause damage. ✔️ Use a waterproof surface: Tile, concrete, or other water-resistant materials are best. ✔️ Ensure proper drainage: A slight floor slope can direct water toward a drain in areas with higher moisture. ✔️ Install a sealed platform if necessary: If placing the sauna on a slatted deck, build a sealed platform underneath to eliminate drafts. Step 5: Plan for Final Details Before installation, consider these final touches: ✔️ Door Size Placement: Ensure the sauna door is positioned for easy access. ✔️ Benches Seating: Plan your seating arrangement based on your comfort and available space. ✔️ Lighting: Use low-wattage, sauna-safe lighting to enhance the atmosphere. Step 6: Shipping Delivery Information All Almost Heaven Saunas ship within the continental U.S. via freight service. Here’s what to expect: ✔️ Delivery Timeline: Most saunas ship within 2-4 weeks, depending on the model and inventory availability. ✔️ Freight Delivery: The sauna will arrive in multiple flat-packaged boxes on a large truck. You will need to unload and move the boxes to your assembly location. ✔️ Curbside Drop-Off: The freight company will deliver the sauna to the curb or driveway, not inside the home or backyard. ✔️ Assembly Required: Most of our saunas are designed for DIY assembly with easy-to-follow instructions. We recommend having at least two people for installation. Need more details? Visit our full Shipping Info page. Preparing your space properly will ensure your indoor sauna lasts for years, providing a safe, comfortable environment for relaxation. Whether you’re placing your sauna in a home gym, bathroom, or basement, taking the right steps will maximize performance and durability. Need help choosing the perfect indoor sauna? Explore our collection of Almost Heaven Indoor Saunas today.
Learn more
Instruction Videos
How to Build a Barrel Sauna
Watch step-by-step instructions for assembling the Watoga 6x5 barrel sauna. While this guide simplifies the process, be sure to consult your manual for complete details. A licensed electrician must hardwire the heater.
How to Build a Bridgeport Indoor Sauna
Follow this detailed guide to assemble your Bridgeport indoor sauna with confidence. DIY-friendly, with clear instructions to help you every step of the way.

How to Build a Rainelle Indoor Sauna
Get a full walkthrough of how to build the Rainelle indoor sauna. Simple, clear, and designed for DIY installation.
How to Build a BlackWater Cube Outdoor Sauna
Follow this guide to build the modern and sleek BlackWater Cube outdoor sauna. A step-by-step breakdown makes assembly easier than ever.

Manuals & Guides
Access all technical documentation for your Almost Heaven products in one central hub. Find the user manuals, installation guides, and detailed specifications you need for any sauna, Harvia heater, hot tub, cold plunge, shower or accessory in our comprehensive resource library.
Save up to $2,300*
Sign up today and get up to $2,300* off your first sauna purchase with a discount just for joining. Exclusions apply.